Description
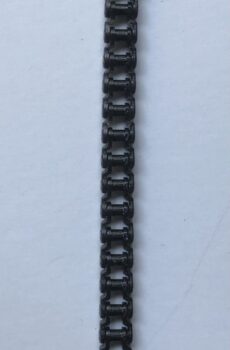
For Sale: Replacement Sprockets for All Nation Chain Drive Transmissions (2 Sets) PN#361AN
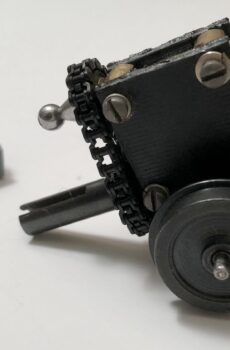
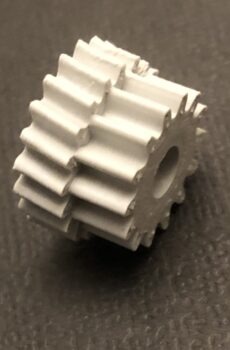
The question is, why would we offer this particular set of sprockets for our All Nation engines? While some of our tower drive transmissions were involute or helix geared mechanisms, others were Delrin chain drive. And in a majority of cases, the sprockets on these drives always failed after many years of use. The root cause of the failure or malfunction was one of two possible scenarios. Either the sprockets aged and cracked, or the drive shafts would turn without turning the sprockets. The sprockets were originally press fit onto their respective shafts. The sprockets used may have been Delrin or nylon material having a limited life.
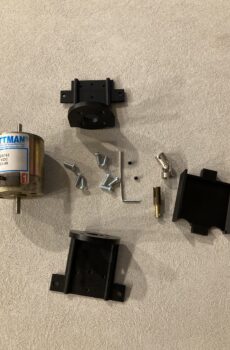
So in my case to restore one of my Grandfather’s AN NW2 switchers, the model sat in the box for years because of the intimidation factor regarding the repair. It was rather expensive, time consuming and problematic in its approach. The motor and all the gearing was in good condition. To service the towers, one would have to take them apart and shear the peened spacer #4040 bushings rendering them somewhat useless.
To make a long story short, I created a new bottom shaft sprocket that would slip over part #4041, the split coupling to drive the opposing axle’s smaller gear box. The upper shaft is easy to service. Therefore, there is no need to take the tower apart, particularly if there are no other issues with the worm gears of associated bushings.
Usually on chain drive systems, one may find to much slack or a linkage that is far to tight. I tried to calibrate as close as I could the 2 sprockets for an optimal length of chain linkage and as fussy as I am, I have even used a triangular file to touch up the teeth. These sprockets are 3D printed with a tough blend of our Poly Carbonate/ABS to press fit onto the shafts and glued with some CA for added measure. On my engine I even drilled and tapped through the hub for a 0-90 set screw using a #60 drill bit.
The entire upgrade took approximately 2 hours to do the dual drive switcher and is back on the layout running like a charm.
For a more complete discussion and visual review of the process, please check out my video link below: